Deploying an Interactive Visualization Without Tears - A Dashboard on Amazon Web Services
Why Deploying?
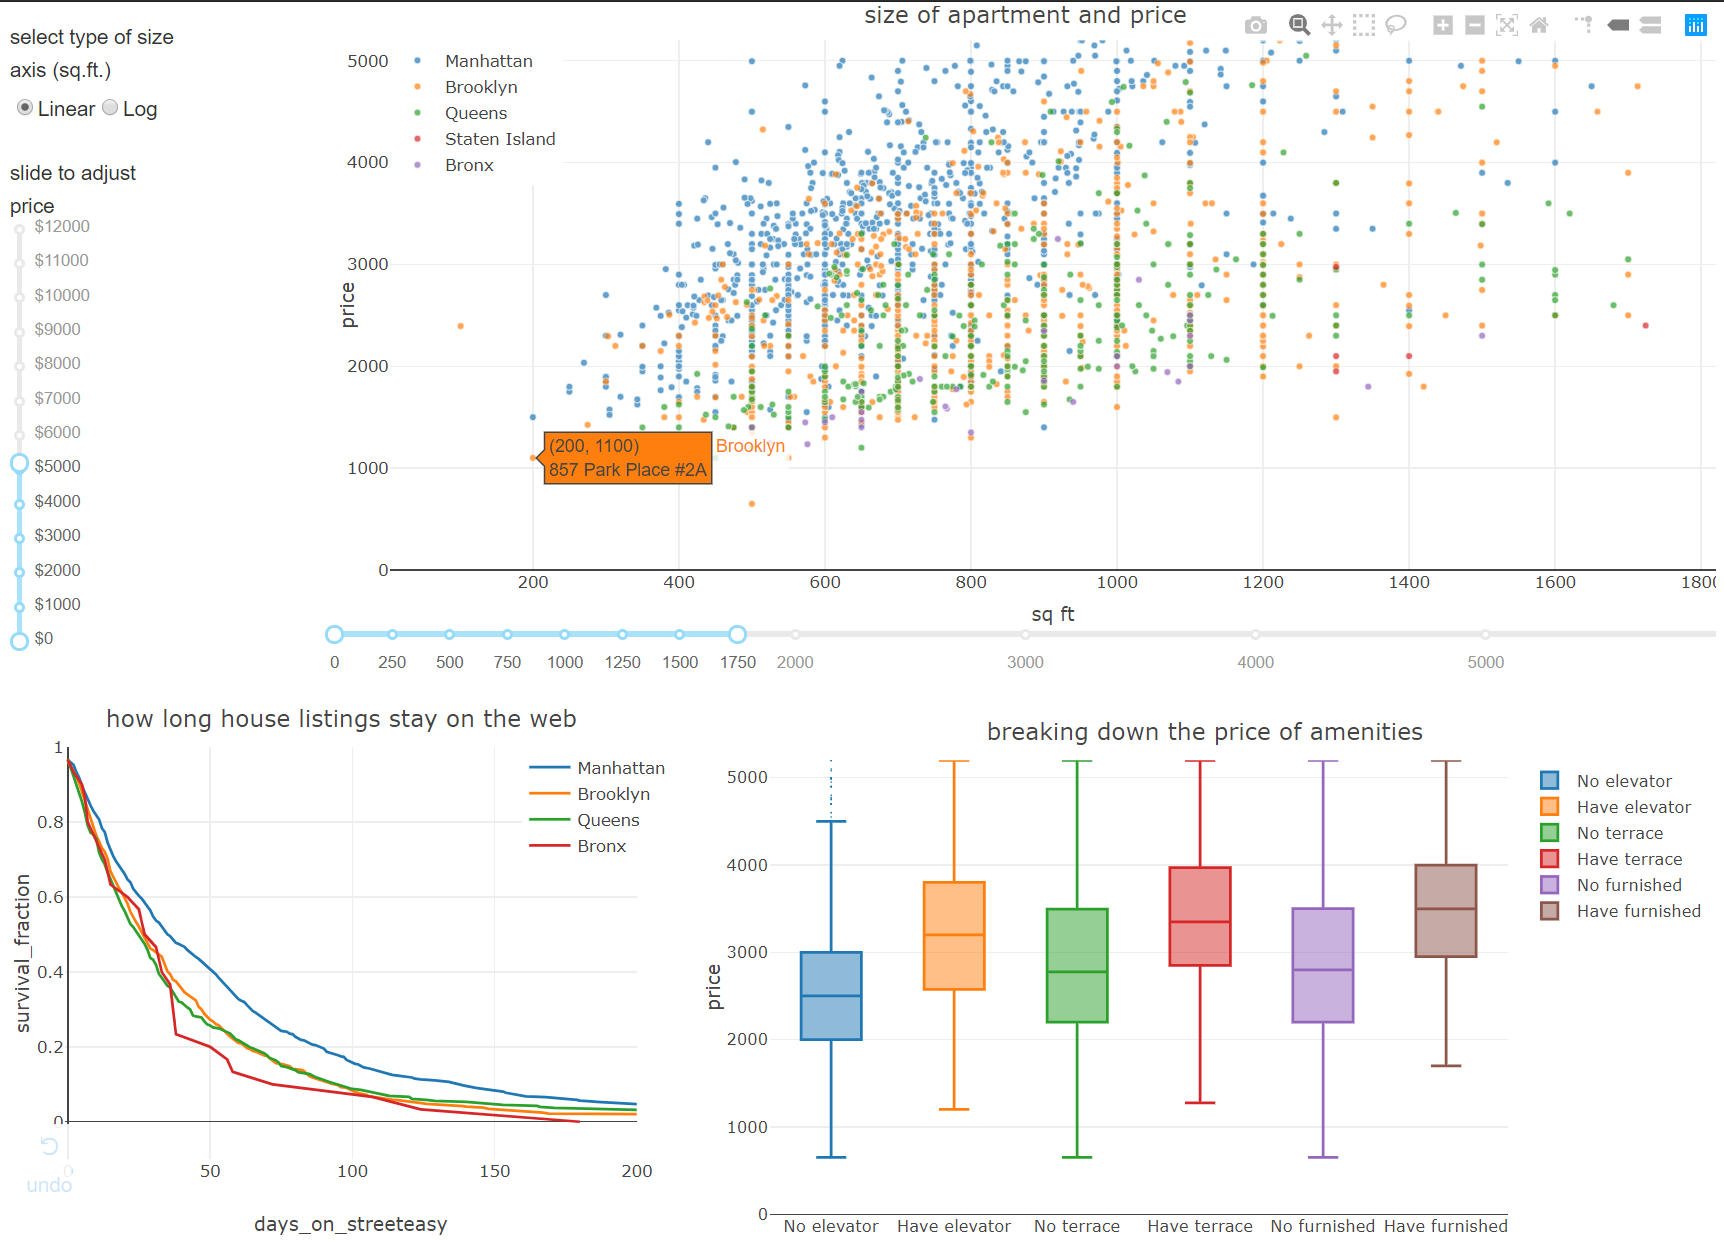
This post will be all about how to put your data out into the light by publishing it as an interactive dashboard hosted on a cloud. All the code that I wrote for this project can be found here. And here is the final product.

Figure 1. my webapp breaking down the NYC rental cost.
What is AWS Elastic beanstalk?
AWS is a cloud computing platform and AWS Elastic Beanstalk is an orchestration service that handles web application deployment. I picked AWS Elastic Beanstalk because it automatically abstracts away many of the complexities associated with hosting a dashboard such as managing docker containers with kubernetes. Therefore, it will allow you to spend more time thinking about content and visualization.
The two key files we need are the application.py file and the requirements.txt file. The application.py file runs the main code for your web app. The application.py file will be different for different application. For my purpose, I use Dash to create interactive data visualization. This blog post will focus on the deployment aspect assuming that you have already created a functional application.py file.
How to host csv file
The raw data here is just a csv file of rental listing in NYC obtained from web scraping. There are many ways to host this dataset, but we will upload the csv file to a Google Sheet. Make sure the Google Sheet is correctly formatted, then get the shareable link from the Google Sheet. This link here tells you how to obtain a shareable link. We will read the csv file into a pandas dataframe using the shareable link.
Local development
The global picture here is very simple. We will create a virtual environment, develop the web app locally, then deploy it on AWS. First, to manage all the packages and versions, we will create a virtual environment. We will use “virtualenv” for this process.
1.1.1 To install virtualenv, type this command
pip install virtualenv 1.1.2 To create a virtual environment (here we call it “virtual”), type this command:
virtualenv virtualAfter a virtual environment is created, you will see a folder called virtual.
1.1.3 To activate the virtual environment, go to the folder virtual, go to the sub-folder Scripts, and run the script called activate by typing the following:
virtual\Scripts\activateYou will see the terminal showing the virtual environment name, indicating that you’re now in the virtual environment.
1.2 The requirements.txt file specifies packages necessary for the web app. If you have it, you can install the packages specified in the requirements.txt by typing:
pip install -r requirements.txtAll the packages and dependencies listed in requirements.txt file will be installed for you in the virtual environment.
If you don’t have the requirements.txt, you can install individual packages and create the requirements.txt by typing:
pip freeze > requirements.txtThis will list all the packages in the virtual environment so that you can keep track of what packages of which versions you installed. This step is important because it might help you debug package incompatibilities. Now if we see an incompatibility, we can go back to this file and check the package versions.
1.3 Test run your application.py file. There are a few quirks to be aware of. For example, Elastic Beanstalk will look for the file name “application.py” to run the web app, be sure to name your file “application.py”.
Deployment
2.1 First let’s set up EB CLI (Elastic Beanstalk Command Line Interface).
This is a command line client that you will use to manage Elastic Beanstalk environments. See this website for instruction how to install EB CLI.
This is how I installed it. Before starting, make sure you have git installed. Read more about git here.
2.1.1 Clone the EB CLI repository from GitHub by typing the following in your terminal:
git clone https://github.com/aws/aws-elastic-beanstalk-cli-setup.gitYou will see a folder aws-elastic-beanstalk-cli-setup
2.1.2 Run the bundled_installer by going to the folder aws-elastic-beanstalk-cli-setup, then go to scripts, then you will find bundled_installer inside. Run the bundled_installer by typing:
aws-elastic-beanstalk-cli-setup\Scripts\bundled_installer2.2 Make sure you have AWS account. If not sign up for one. Note on signing up; You have to find the AWS-access-key (This is the so-called public key), and AWS-secret-key. Noted that this is different from the account ID (12 digits number). The AWS-access-key and AWS-secret-key are hideously long, and you must keep it secret.
If you are here, you’re very close.
2.3 Initiate EB and create a directory. In your terminal, type:
eb initthen a new command window should show up asking you to set up an AWS EB directory.
Set a region (default region is usually fine). If they ask for an application name, give it a name. For the first time, it will ask for an access-key and secret-key, these are what you have in instruction 2.2. (the really long one you downloaded in .csv file when you signed up)
2.4 Use python 3.6 (which is the default)
2.5 Do not set up SSH
Now you have initialized a directory.
2.6 To create a new environment where your web app will run, type:
eb createEnter the environment name (for example, your-environment-name), and DNS NAME. Select a load-balancer type (use 2 which is a default for application)
If the work is sucessfull, you will see the result in the updated webapp.
The URL will be:
your-environment-name.us-west-2.elasticbeakstalk.com
That’s it!
2.7 To make sure you can see the webapp. Any local changes can be uploaded to the eb by typing
eb deployIt will re-read in any change you make to the application.py and deploy the updated version for you.
2.8 Termination if you want to terminate the environment (to save yourself some money, because running AWS all the time can cost a lot!) you can delete the app from the cloud. Just type
eb terminate 